Airwolf Paper Model

Save

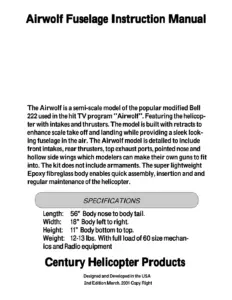
This document Airwolf Fuselage Instruction Manual provides detailed guidance on assembling the Airwolf model fuselage, a semi-scale replica of the Bell 222 helicopter from the TV series “Airwolf”. Designed for modelers, it features retractable landing gear, lightweight fiberglass construction, and intricate detailing like intakes and thrusters. The manual includes step-by-step instructions with illustrations for mounting retract assemblies, attaching landing gear, and fitting the clear windshield. With a focus on quick assembly and maintenance, this manual offers hobbyists an opportunity to create a sleek and realistic Airwolf model. Purchase this Century Helicopter product for a top-quality scale model experience.

Airwolf Paper Model

Category:

Copyright

© All Rights Reserved

Page 1

Airwolf Fuselage Instruction Manual Airwolf Fuselage Instruction Manual Airwolf Fuselage Instruction Manual Airwolf Fuselage Instruction Manual Airwolf Fuselage Instruction Manual

Length: Length: Length: Length: Length: 56" Body nose to body tail. 56" Body nose to body tail. 56" Body nose to body tail. 56" Body nose to body tail. 56" Body nose to body tail.

Width: Width: Width: Width: Width: 18” Body left to right. 18” Body left to right. 18” Body left to right. 18” Body left to right. 18” Body left to right.

Height: Height: Height: Height: Height: 11” Body bottom to top. 11” Body bottom to top. 11” Body bottom to top. 11” Body bottom to top. 11” Body bottom to top.

Weight: Weight: Weight: Weight: Weight: 12-13 lbs. With full load of 60 size mechan-12-13 lbs. With full load of 60 size mechan-12-13 lbs. With full load of 60 size mechan-12-13 lbs. With full load of 60 size mechan-12-13 lbs. With full load of 60 size mechan-ics and Radio equipment ics and Radio equipment ics and Radio equipment ics and Radio equipment ics and Radio equipment

Designed and Developed in the USA

2nd Edition March, 2001 Copy Right

SPECIFICATIONS

The Airwolf is a semi-scale model of the popular modified Bell

222 used in the hit TV program "Airwolf". Featuring the helicop-ter with intakes and thrusters. The model is built with retracts to enhance scale take off and landing while providing a sleek look-ing fuselage in the air. The Airwolf model is detailed to include front intakes, rear thrusters, top exhaust ports, pointed nose and hollow side wings which modelers can make their own guns to fit into. The kit does not include armaments. The super lightweight Epoxy fibreglass body enables quick assembly, insertion and and regular maintenance of the helicopter.

Century Helicopter Products Century Helicopter Products Century Helicopter Products Century Helicopter Products Century Helicopter Products

Page 2

2. Assemble front retract mount former assembly by useing F1, F2 & F3. Dry fit (not using glue) plywood into the fuselage. If everything fits OK then glue into the body. Please See Fg.3

Fg.3-1

Fg.3

F2 F1 F3

3. Assemble two rear landing retract wood former by using F7, F8, F9, F10, F11 & F12. Dry fit one side first (not using glue) then try fit to the fuselage if every thing fits OK then glue the assembly together. Glue retract former assembly on the side body and attach F11 from inside of the fuselage. Please See Fg.4

Fg.4 Fg.4 Fg.4 Fg.4 Fg.4 Fg.4-1 Fg.4-1 Fg.4-1 Fg.4-1 Fg.4-1

Fg.1 Fg.1 Fg.1 Fg.1 Fg.1

Fg.2 Fg.2 Fg.2 Fg.2 Fg.2

Thank You For Purchaseing The Century Top Quality Scale Airwolf Fuselage!

Thank You For Purchaseing The Century Top Quality Scale Airwolf Fuselage!

Thank You For Purchaseing The Century Top Quality Scale Airwolf Fuselage!

Thank You For Purchaseing The Century Top Quality Scale Airwolf Fuselage!

Thank You For Purchaseing The Century Top Quality Scale Airwolf Fuselage!

1.) Review package contents to insure all parts are accounted for. Use mildly warm and soapy water to clean fuselage before building.

F8 F10 F12 F7 F9

F11 Glue from another side to inforce the body.

Page 3

4. Assemble main mechanics’ wood former by using F4, F5x2 , F6 and Aluminum cross mem-ber tube. Dry fit (not using glue) then try fit to the fuselage. If every thing fits to your liking then apply glue. Aluminum Tube will need to be glued to the plywood and body. Also glue to F6 by using some fiberglass cloth with epoxy covered. See Fg.5 Note! The two of F5 hardwood curve side should face back and attach to F6. Please See Fg.6

Fg.6 Fg.6 Fg.6 Fg.6 Fg.6

Fg.5 Fg.5 Fg.5 Fg.5 Fg.5

5. Cut the clear windshield to fit inside of the front nose, useing “GOOP “or “Zap A-Dap-A Goo” sili-con base type glue to at-tached to front nose. Note!

Do not over cut the plastic.See Fg.6

Fg.6 Fg.6 Fg.6 Fg.6 Fg.6

Fg.7 Fg.7 Fg.7 Fg.7 Fg.7

F14

6. Cut off top window and bottom window to fit on the main body by using “GOOP “or “Zap A-Dap-A Goo” silicon base type glue.

7. Cut the clear Jet exhaust off and glue on to back part of main body. See Fg.6-1

8. Install F14 into the body and dry fit after glue is in place. Two of L” shape aluminum mounts used to mount mechanics to F14. F13 Choose wether or not to use, depends you want to use original tail boom or change to piano wire with brass tube (not include in the kit). See fg.7

fg. 6-1

Page 4

Gluing Instrutions: All Century fuselage kits come with epoxy fiberglass and wood parts. Here are our sugges-tions for the following glue applications:

1. Wood to Wood use Epoxy or Slow CA glue.

2. Wood to Glass or Glass to Glass use “Stabilit” and if neccessary, reinforce with glass cloth and Epoxy.

This Airwolf fuselage kit comes with pre-primed. no pin hole filler work required, use 600-800 slightly moist sand paper to smooth the body surface. Wipe down the fuselage with clean warm water. Once dry the fuselage is ready to paint.

9. Cut the fiberglass screen to fit inside of top cap by using epoxy glue. See Fg.8

10. Glue the fiberglass exhaust duct on top of cap by using epoxy glue. See Fg. 9

11. Attach tail boom to the main body by using epoxy glue. and attach horizontal fin to the tail boom by using epoxy glue. Glue two fin tips on either end of the horizontal fin. See Fg. 10

12. Determine tail out put shaft direction then attach vertical tail fin on opposite side. See Fg.11

13. Install Tail gear box end cap by self taping screws.

Parts list:

1. CN4035-1 Main fiberglass body 1

2. CN4035-2 Top fiberglass body 1

3. CN4035-3 Left & Right fiberglass wing 1

4. CN4035-4 Tail boom, Tail Fins & cap 1

5. CN4035-5 Clear front windshield & Ass. 1

6. CN4035-6 Wood, Aluminum tibe & Hardware 1

7. CN4035-7 Instructions 1

8. CN2036 60 size retract gear 3 piece w/ wheel (optional parts) 1

fg.8 fg.9

fg.10

fg.11

of 0
Share:
Related

Document

Report This Content

Copyright infringement

If you are the copyright owner of this document or someone authorized to act on a copyright owner’s behalf, please use the DMCA form to report infringement.

Report an issue